


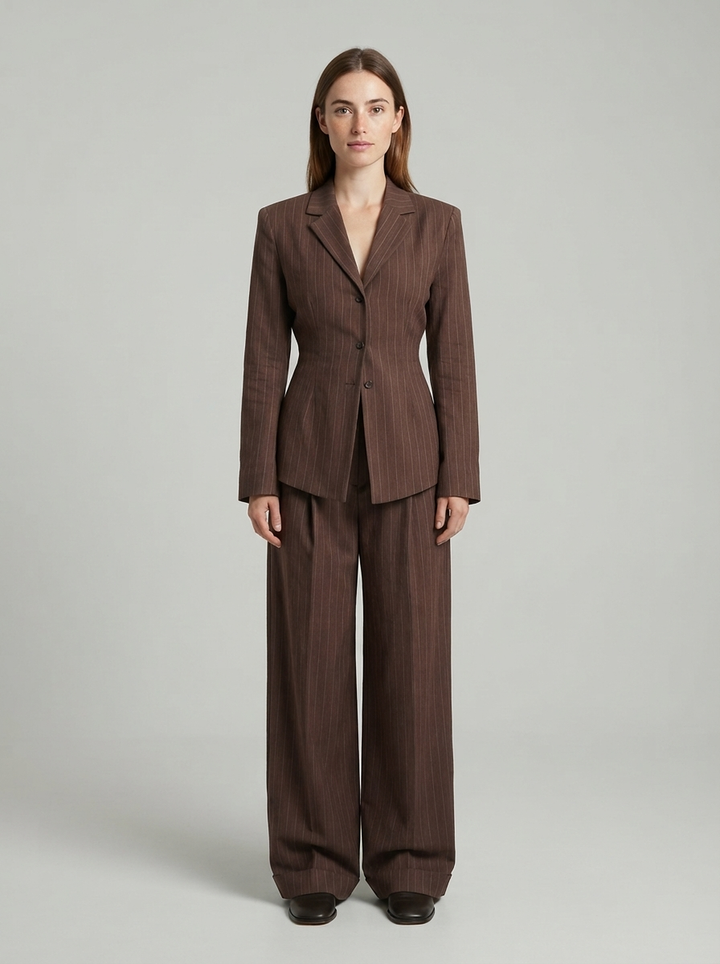


Striped Blazer and Wide-Leg Trouser Set
- Secured track & trace Shipping
- More than +2550 satisfied customers
- 30-Day Easy Returns
Mix & Match any items — discount applies automatically in cart
Our customer service is available 24/7 to answer all your questions and comments. Whether you need advice on a product or help with an order, we are here to support you.
Don’t hesitate to contact us; we’re happy to help!
info@harper-australia.com
We ship our packages with a Track & Trace code so you can always monitor your order.
You will receive the Track & Trace code via email within 48-72 hours after placing your order.
If our product does not meet your expectations, you can return it within 30 days upon receipt.
Before returning the goods, please contact our customer service at info@harper-australia.com and let us know the reason for the return so we can process your request correctly.
Please review our return policy for more information!
A Print-Led Co-Ord for the Office
This two-piece co-ord from KONDALA pairs a stripe-print blazer with wide-leg trousers. The blazer is designed with a loose, shrug-inspired silhouette that sits relaxed across the shoulders. The stripe pattern adds visual interest while remaining well suited to office and professional settings. Both pieces are designed for Autumn and Winter wear.
The wide-leg trousers are cut with a mid-rise waistband and a generous leg opening. Trouser measurements for size XS: waist approximately 66 cm, hip approximately 96 cm, outseam length approximately 107 cm. These figures scale proportionally across the size range and are intended as a guide.
Set Contents and Sizing
Both the striped blazer and the wide-leg trousers are included at the listed price. This is a two-piece set and is sold together. Sized to Australian standards from XS through to L. The blazer has no front opening and is pulled on over the head. It also works well as a standalone layer with other wardrobe pieces. Two-piece set. Blazer and trousers sold together.
Worth a look
| Size | AU Size | Bust | Length | Shoulder | Waist |
|---|---|---|---|---|---|
| XS | 6 | 98 | 72 | 45 | 88 |
| S | 8 | 102 | 73 | 46 | 92 |
| M | 10 | 106 | 74 | 47 | 96 |
| L | 12/14 | 110 | 75 | 48 | 100 |
Swipe sideways to see the full size guide
Size Guide, Bottom (cm)
| Size | AU Size | Waist | Hip | Length(Bottoms) |
|---|---|---|---|---|
| XS | 6 | 66 | 96 | 107 |
| S | 8 | 70 | 100 | 108 |
| M | 10 | 74 | 104 | 109 |
| L | 12/14 | 78 | 108 | 110 |
Swipe sideways to see the full size guide
Swipe the table sideways to see all columns.
Size Guide
| Size | AU Size | Bust | Length | Shoulder | Waist |
|---|---|---|---|---|---|
| XS | 6 | 98 | 72 | 45 | 88 |
| S | 8 | 102 | 73 | 46 | 92 |
| M | 10 | 106 | 74 | 47 | 96 |
| L | 12/14 | 110 | 75 | 48 | 100 |
Swipe sideways to see the full size guide
Size Guide, Bottom (cm)
| Size | AU Size | Waist | Hip | Length(Bottoms) |
|---|---|---|---|---|
| XS | 6 | 66 | 96 | 107 |
| S | 8 | 70 | 100 | 108 |
| M | 10 | 74 | 104 | 109 |
| L | 12/14 | 78 | 108 | 110 |
Swipe sideways to see the full size guide
Swipe sideways to see all columns.


